리액트를 다루는 기술 + typescript 6장 2
초기 상태 설정하기 - Typescript Version
-
<li>항목에key속성에index를 넣게 되면, 나중에 배열이 변경 될 때 효율적이지 못합니다. -
따라서,
useState를 활용하여 동적인 배열을 렌더링 하는 법을Typescript로 구현하도록 하겠습니다.
IterationSample.tsx
import React, {useState} from 'react';

// 1. 에서 설명
interface nameIFace{
    id : number;
    text : string;
}

const IterationSample = () : JSX.Element => {
    // 2. 에서 설명
    const [names, setNames] = useState<nameIFace[]>([
        {id : 1, text : '눈사람'},
        {id : 2, text : '얼음'},
        {id : 3, text : '눈'},
        {id : 4, text : '바'}
    ]);

    const [inputText, setInputText] = useState<string>('');
    const [nextId, setNextId] = useState<number>(5); //새로운 항목을 추가할 때 사용 할 id

    // 3. 에서 설명
    const nameList = names.map(name => <li key={name.id}>{name.text}</li>)
    return <ul>{nameList}</ul>
}
export default IterationSample;
-
useState로 선언될names의 타입을 정확히 하기 위해 선언 한interface입니다.
-
{id : 1, text : '눈사람'}의 type 은nameIFace입니다.useState를 선언하며 초기값의 형태를 [nameIFace,nameIFace,nameIFace, …] 이므로
useState의interface를nameIFace[]로 지정 한 것 입니다. -nameIFace배열
-
names.map(name => .....)선언하게 되면,name의 타입은nameIFace가 됩니다.nameIFace가 가지고 있는 값은id와text였죠?- 따라서
name => <li key={name.id}>{name.text}</li>하면 고유 값을 인덱스로 넣지 않을 수 있습니다.
데이터 추가 기능 구현하기 - Typescript Version
-
input과button을 추가하여 구현합니다. -
추가 버튼 클릭 시,
concat메서드를 이용하여 복사본에 복사 한 뒤,setNames()로
새로운 배열을 설정합니다.setNextId(nextId + 1)을 통해 다음에 넣을 고유 값도 증가시킵니다.setInputText('')하여input칸을 비웁니다.
-
이전에 포스팅 하였던
Typescript문법에 대해서 배우셨으리라고 생각하고
시원하게 작성 해 보겠습니다. - 참고로 지금까지도 복사 붙여넣기 하지 않았습니다..
IterationSample.tsx
import React, {useState} from 'react';

interface NameIFace{
    id : number;
    text : string;
}

const IterationSample = () : JSX.Element => {
    const [names, setNames] = useState<NameIFace[]>([
        {id : 1, text : '눈사람'},
        {id : 2, text : '얼음'},
        {id : 3, text : '눈'},
        {id : 4, text : '바람'},
    ]);
    const [inputText, setInputText] = useState<string>('');
    const [nextId, setNextId] = useState<number>(5);

    // <input>에 글자 하나마다 실행되는 메서드
    const onChange = (e : React.ChangeEvent<HTMLInputElement>) : void => setInputText(e.target.value);

    // <button> 클릭 시 실행되는 메서드
    const onClick = () : void => {
        // 복사본 nextNames에 새로운 항목을 concat으로 연결하여 전달합니다.
        const nextNames = names.concat({
            id : nextId,
            text : inputText,
        });
        //다음 클릭 시 고유 key값을 위해 nextId를 +1 합니다.
        setNextId(nextId + 1);
        // 새로 만든 복사본 배열에 setNames를 사용하여 새로운 names를 설정합니다.
        setNames(nextNames);
        // <input> 안의 내용을 비웁니다.
        setInputText('');
    };

    const namesList = names.map((name : NameIFace) => <li key={name.id}>{name.text}</li>);

    return (
        <div>
            <input value={inputText} onChange={onChange} />
            <button onClick={onClick}>추가</button>
            <ul>{namesList}</ul>
        </div>
    );
};
export default IterationSample;
-
const onClick함수에 복사본을 만들 당시concat을 쓰는 이유는, 새로운 배열을 만들어 주기 때문입니다. -
push는 기존 배열 자체를 변경해버리기 때문에 쓰지 않습니다.
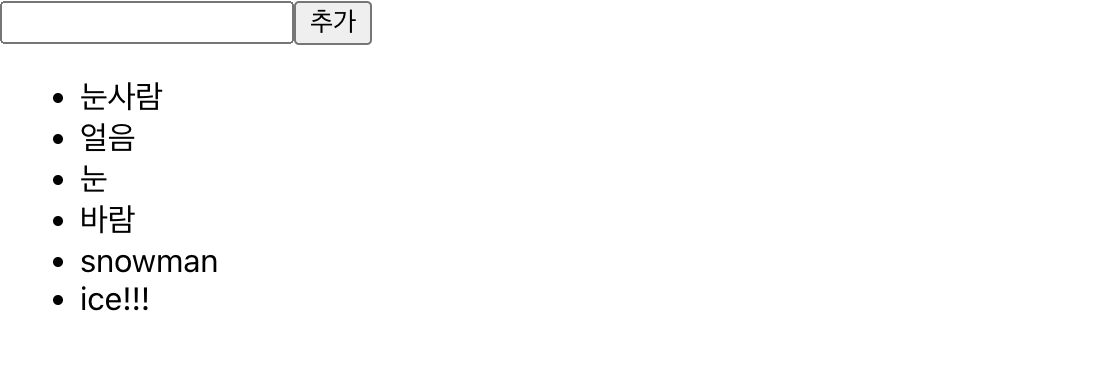
결과물
데이터 제거 기능 구현하기
-
<li>부분을 더블 클릭 했을 때 해당 항목이 사라지는 기능을 구현합니다. -
불변성을 유지하면서 배열의 특정 항목을 지우기 위해 배열의 내장 함수
filter를 사용합니다.
Filter Example 1
const numbers = [1, 2, 3, 4, 5];
const biggerThanThree = numbers.filter(number => number > 3);
// result : [4, 5]
-
메서드의 원형은
배열.filter(callback)입니다. -
callback함수를 제작할 때, 주어진 조건에 만족하는 원소들만 반환한다고 생각하시면 편합니다.
또 다른 예제
Filter Example 2
const numbers = [1, 2, 3, 4, 5];
const isNotThree = numbers.filter(number => number !== 3);
// result : [1, 2, 4, 5];
-
주어진 조건에 만족하는 원소들만 반환하므로,
3이 아닌원소들을 새로운 배열로 반환한다고 생각하시면 됩니다.
IterationSample.tsx
import React, {useState} from 'react';

interface NameIFace{
    id : number;
    text : string;
}

const IterationSample = () : JSX.Element => {
    const [names, setNames] = useState<NameIFace[]>([
        {id : 1, text : '눈사람'},
        {id : 2, text : '얼음'},
        {id : 3, text : '눈'},
        {id : 4, text : '바람'},
    ]);
    const [inputText, setInputText] = useState<string>('');
    const [nextId, setNextId] = useState<number>(5);

    const onChange = (e : React.ChangeEvent<HTMLInputElement>) : void => setInputText(e.target.value);
    const onClick = () : void => {
        const nextNames = names.concat({
            id : nextId,
            text : inputText
        });
        setNextId(nextId + 1);
        setNames(nextNames);
        setInputText('');
    };

    // onRemove(해당 객체의 key=id 값)이 실행되면,
    // 해당 id를 가진 객체만 삭제한다.
    const onRemove = (id : number) => {
        const nextNames = names.filter((name : NameIFace) => name.id !== id);
        setNames(nextnames);
    }

    // onDoubleClick에 콜백 함수를 넣어, 더블 클릭 시에만 실행 될 수 있게 한다.
    const namesList = names.map((name : NameIFace) => (
        <li key={name.id} onDoubleClick={() : void => onRemove(name.id)}>
            {name.text}
        </li>
    ));

    return (
        <div>
            <input value={inputText} onChange={onChange} />
            <button onClick={onClick}>추가</button>
            <ul>{namesList}</ul>
        </div>
    )
}
export default IterationSample;
결과물

- 전부 더블클릭하여 리스트를 없앤 모습입니다.